
Mastering Vim: How This Timeless Editor Can 10x Your Developer Productivity
TL;DR
Mastering Vim boosts productivity with fast, keyboard-only editing. Learn key modes (normal, insert, visual), navigation (hjkl, w, b), editing (i, a, x), text changes (d, c), new lines (o, O), and motions (gg, G, $). The article also covers Vim setup in VS Code. Embrace a keyboard-first workflow for efficient coding.
Have you ever been coerced to try Vim from other developers? Well, it might be the best thing after sliced bread with toppings to go with it.
When I started coding many years ago, I didn’t initially opt to use the various commands like the i, u, j, k commands to boost my productivity with Vim but leaned to the traditional IDEs that allowed the mix of the use of the keyboard and mouse to interact with my code.
In this article, we will explore the use of Vim embedded in your code editor to unlock lightning fast coding and supercharge your experience allowing you to work efficiently and effectively without the mouse dependency.
What is Vim?
Vim, a developer productivity tool, is a free and open-source text editor. With Vim, every action from navigating through lines of code to making intricate edits, happens completely with the keyboard meaning, you do not need to stop coding, grab the mouse, and then get back to coding.
Have a keyboard-first coding mindset.
Installing Vim Extension
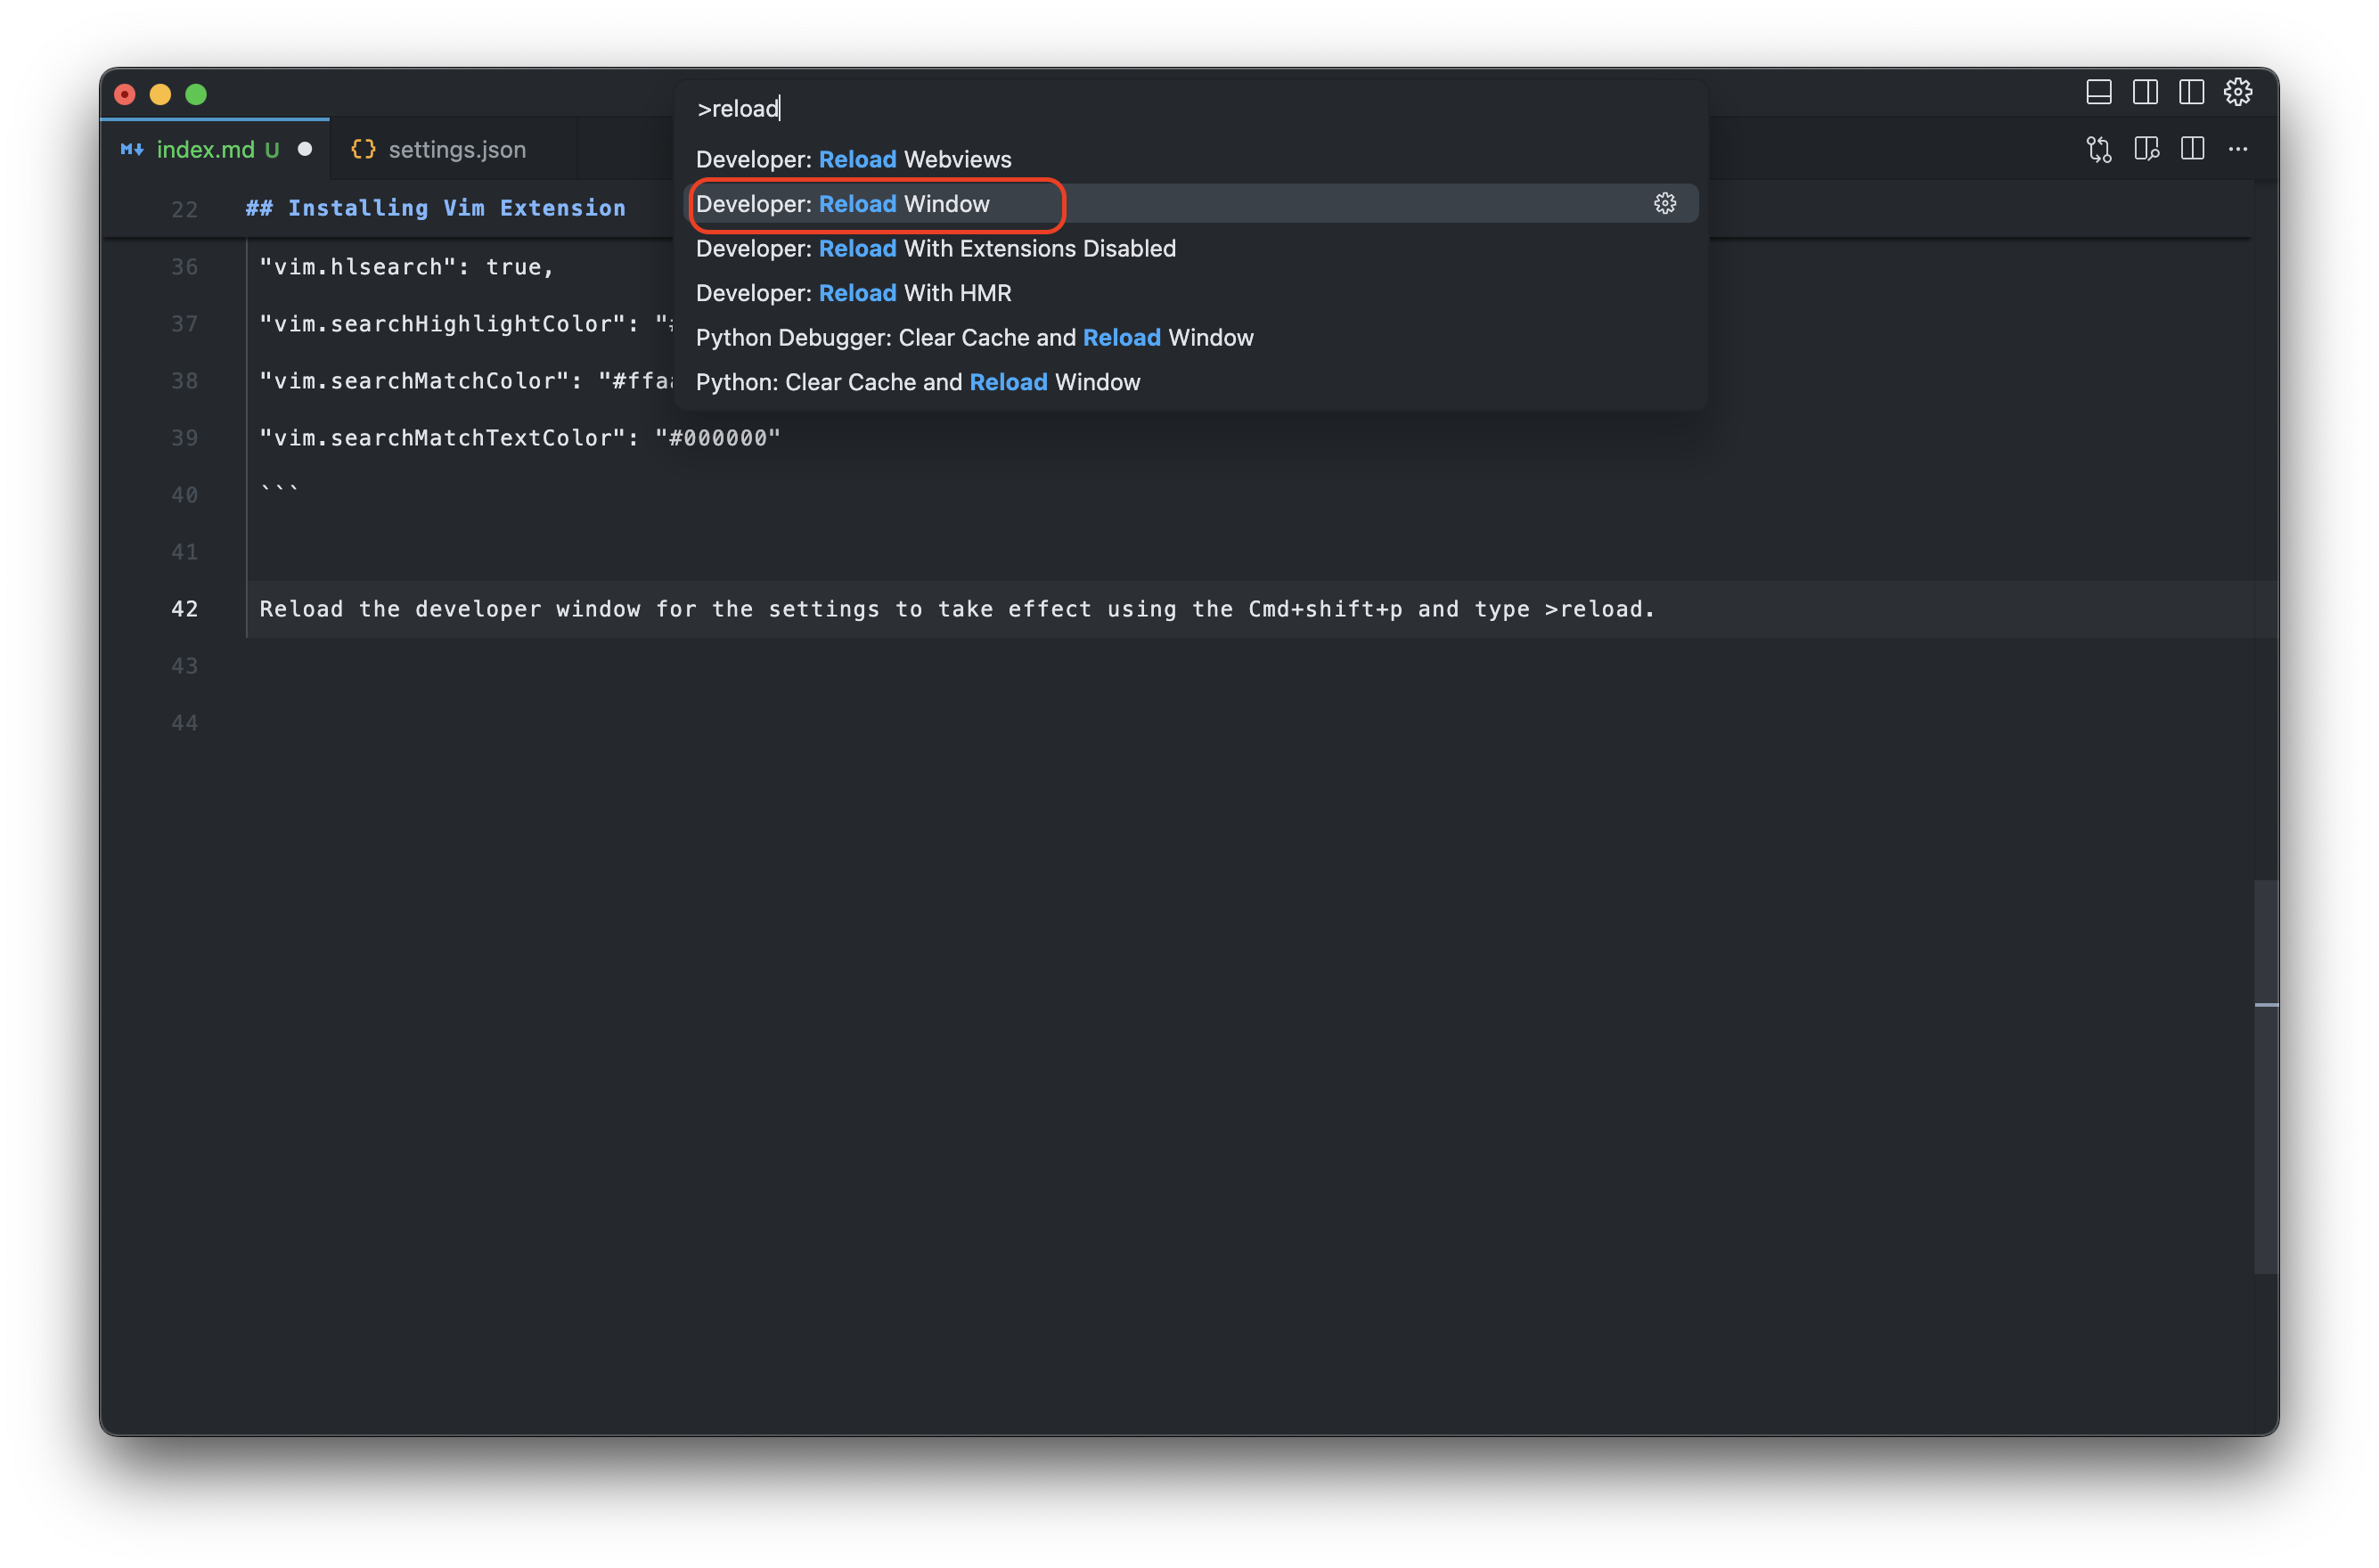
Before using the commands available in Vim, you need to prepare your development environment. If you’re using VS Code as your preferred editor, search for the Vim extension and install it.
Once intalled, head to your editor settings and configure Vim in the .json file to have a good user experience when coding.
Copy and paste the following into your settings.json:
"vim.smartRelativeLine": true,
 "vim.showMarksInGutter": true,
 "vim.useSystemClipboard": true,
 "vim.leader": "<space>",
 "vim.highlightedyank.enable": true,
 "vim.hlsearch": true,
 "vim.searchHighlightColor": "#734d00",
 "vim.searchMatchColor": "#ffaa00",
 "vim.searchMatchTextColor": "#000000"
Reload the developer window for the settings to take effect using cmd+shift+p and type >reload.
Edit Faster with Motions and Modes
For this section, you will get familiar with using the following:
- the normal mode to navigate around the editor
- the insert mode to type and change your code
- save and quit
- :w: write (save) the file
- :q: quit
- :q!: quit without saving changes
- :wq: write then quit
Core Motions in Vim
For Vim users, knowing these four keystrokes would afford you the chance to move the cursor in the forward, backward, downward, and upward direction.
         ↑
         k
     ← h   l →
         j
         ↓
Combining the characters j and k with a number, you can jump to a different line number. For instance using 8k, moves the cursor eight places from the current position upwards.
In addition to character movements, the cursor can be moved across entire words:
- e: move to the end of the current word
- w: move to the start of the next word
- b: move to the start of the previous word
Motions can also be applied to moving to a particular text using w and b with a specified number. For example to move to the 5th word in a sentence, try pressing 5w.
P.S.: To enter the normal mode, always press the ESC key on the keyboard which prevents edit in this mode.
Basic Editing in Vim
The insert mode allows you to enter characters in the text editor by pressing i. Once the edit is complete, press the ESC key to return to normal mode. Another way to enter the insert mode is to use a for append which moves the cursor in front of a character.
Note that not all editing requires entering the insert mode. Sometimes, still in normal mode, using x will delete the character under the cursor. Other important Vim commands to notice are r which replace the character under the cursor and R (replace mode) overwrites characters instead of inserting them.
// go from this
----
----
// to this using R
====
====
Deleting and Changing Text in Vim
Just like your regular delete key on your keyboard, Vim has a special command (d) that handles deleting text combined with a motion based on cursor movement.
- dw: delete from the cursor until the next word
- de: delete from the cursor until the end of the current word
- diw: deletes the entire word regardless of the cursor position. That is delete inner word
If you make any mistake, remember to press the u key to undo the edit and <CTRL-R> to redo edits.
Now, let’s delete lines with the movements j and k.
- dd: delete the current line
- dk: delete the current line and the previous line
- dj: delete the current line and the next line
- d2j / d2k: delete the current line and the next and/or previous 2 lines
To change a text, use the c command which automatically enters the insert mode after deleting text. The same way where d was used above, c can be used like ciw or ce.
Create a New Line
Use either of the following:
- o: creates a new line
- O: adds a new line above the cursor
Think of it like “adding” a new line
Yank (Copy and Paste) in Vim
In Vim, copying is referred to as yanking and it is denoted with y to yank text based on a motion.
- yy: yank the current line
- yiw: yank the current word
- y3j: yank the current line with the next 3 lines
Now, the question on your lips, how do you paste the yanked text? Use the p key. And if you try duplicating the next line, use yyp.
To duplicate a text multiple times after yanking, attach a number to the p command, like this yy3p.
In Vim, when yank is performed, it is saved in a Register which is a mini clipboard that stores small bits of information about the state of the editor.
Mastering Large Motions in Vim for Faster Navigation
Apart from the small cursor movements using hjkl and w, Vim has additional commands used for covering a large distance.
- gg: move the cursor to the first line of the document
- G: move the cursor to the last line
Similar to j and k, + moves down a line and position the cursor at the first character in that line. While - goes a line up.
Other commands worth trying are:
- 0: moves to the very beginning of a line
- ^: move to the first non-blank character
- 0w: the cursor jumps to the beginning of the sentence
- $: move to the end of the line
- <CTRL-E>: To scroll down
- <CTRL-Y>: To scroll up
- <CTRL-D>: move the cursor down half a page
- <CTRL-U>: move the cursor up half a page
- zz: center the window to the current cursor position
P.S.: As with other Vim commands, scrolling can be combined with a number to scroll multiple lines. Use 10CTRL-E to scroll down 10 lines.
Conclusion
Practice, practice, and practice!!!
Using Vim is all about building muscle memory and not by memorizing the keystrokes. The more your hands are on the keyboard, the better for you as your coding workflow improves drastically.